

![]()
I’ve been a bit obsessed with plants lately, I got some new ones now that we moved to our new house and when Mayita comes shopping with me she asks me if she can have a plant of her own too.
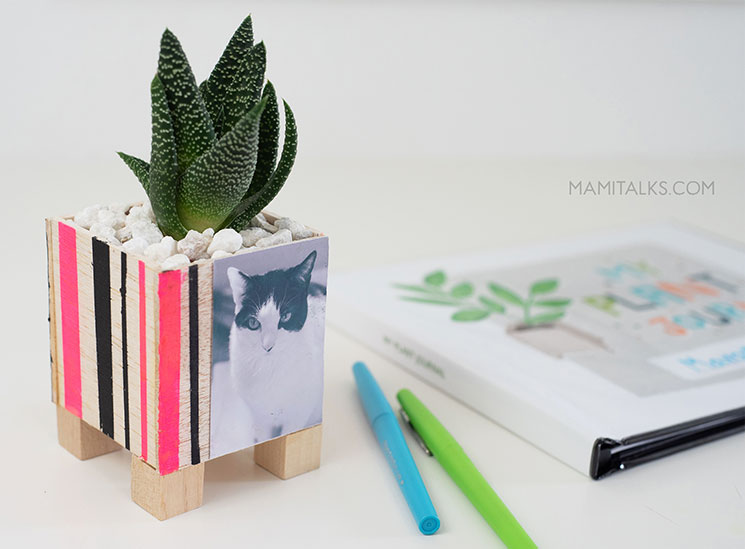
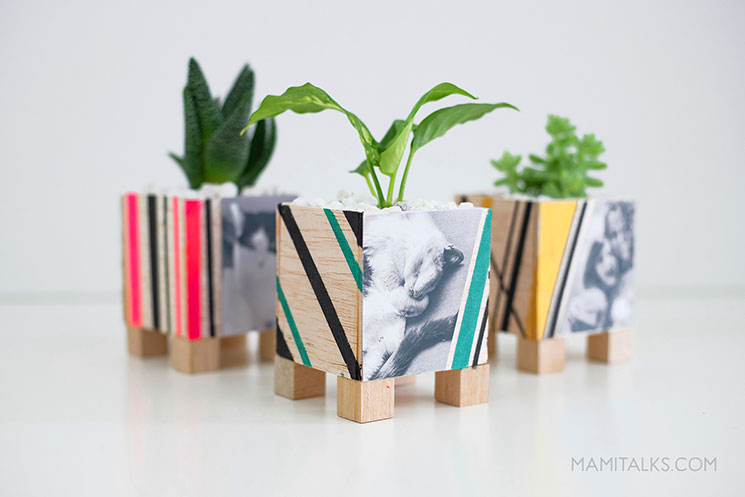
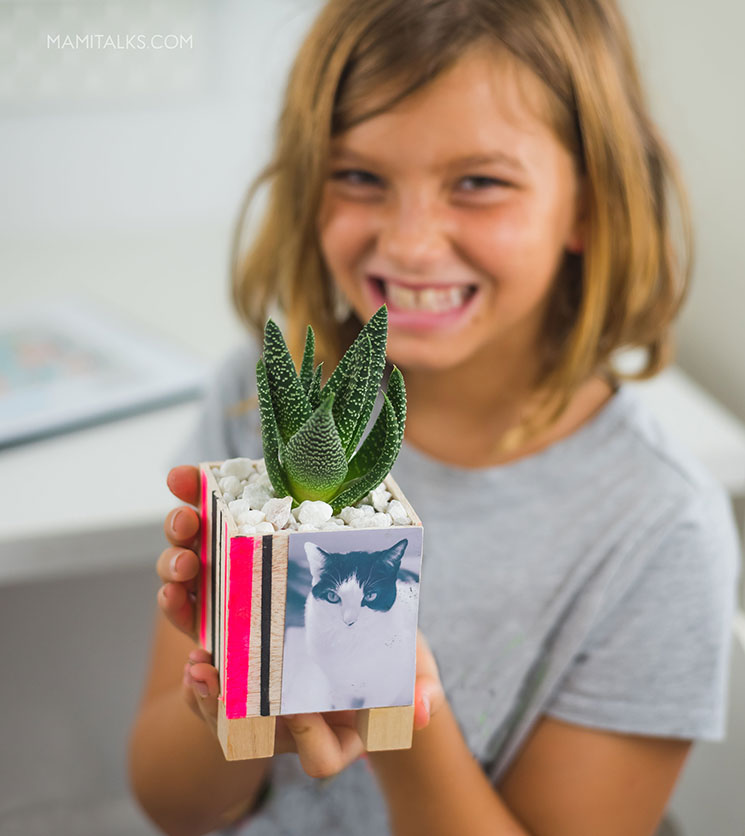
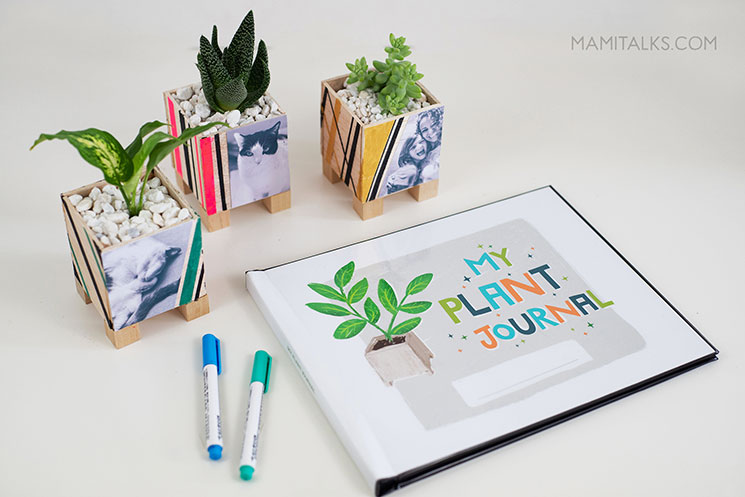
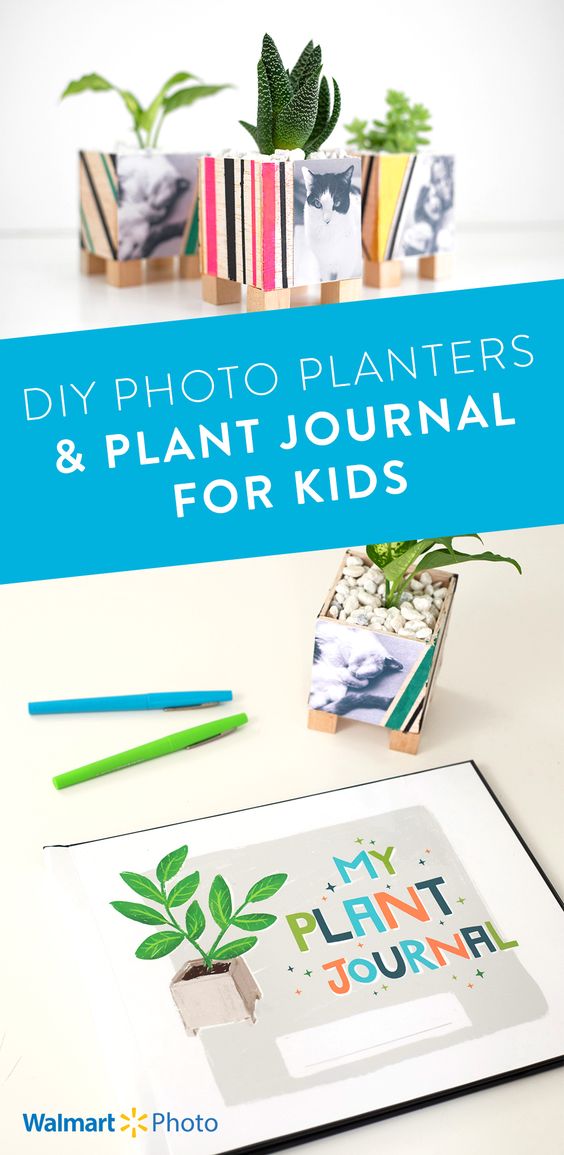
That was what sparked this DIY photo planter idea, she can have her little plant on her desk and learn to take care of it with the plant journal addition!
The prints and journal can be made through Walmart Photo, once you decide what to print it is affordable and ready the same day, you don’t have to wait days to start your craft!
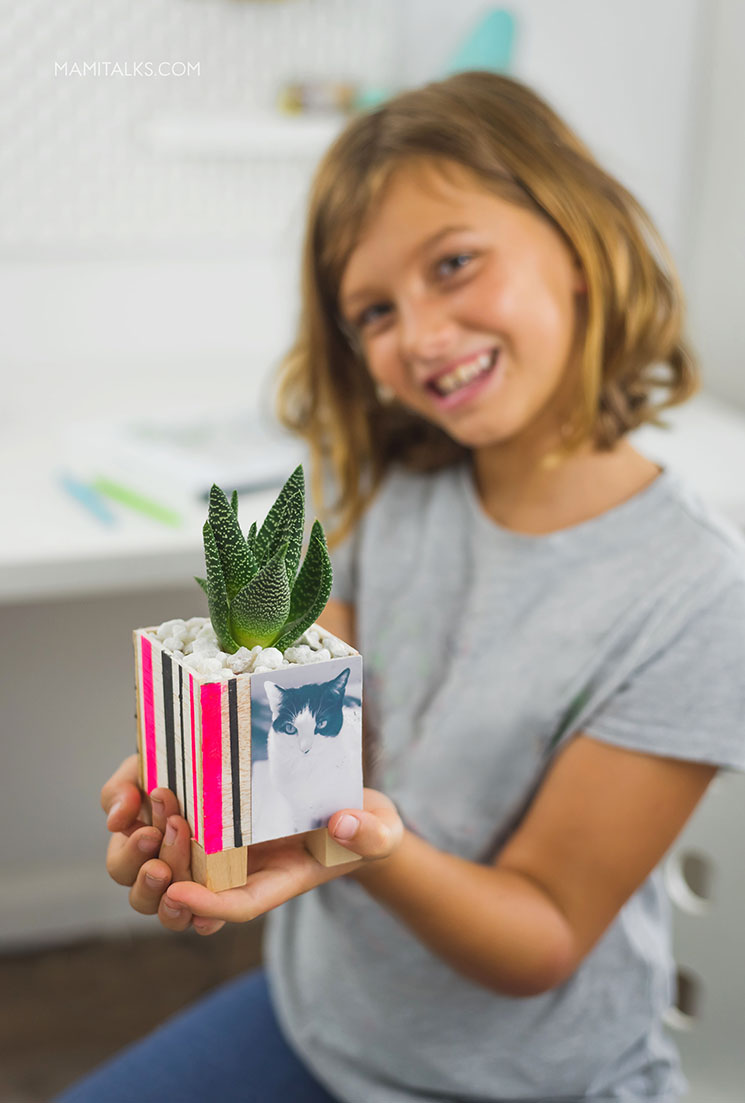
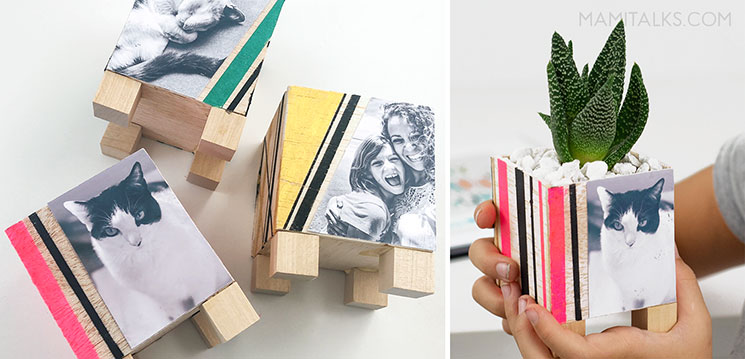
When we started making it I asked Maya what photo would she like on it and the winner subjects were the kitties! If it was for me I would choose the picture with us together, but keep in mind who you will be making it for so they can have a very personalized planter.
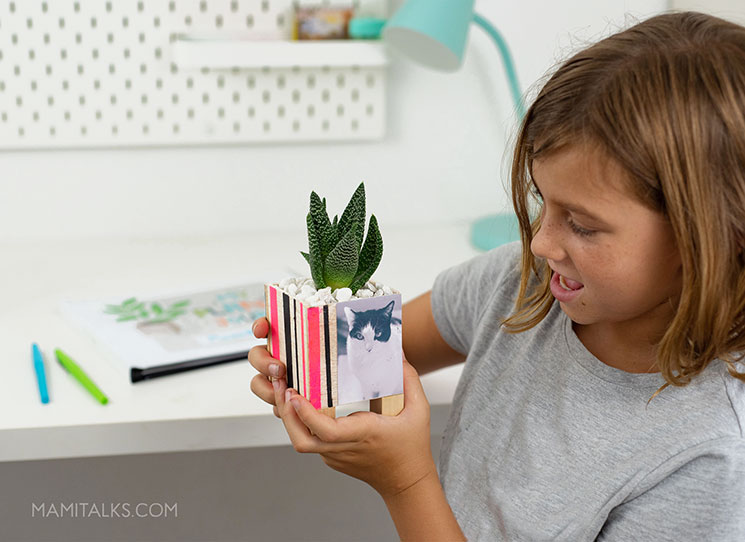
We made the planter together, she was able to mask the areas and paint the stripes herself, she even decided which colors to use, we had a fun time for sure!! Try it with your kids!
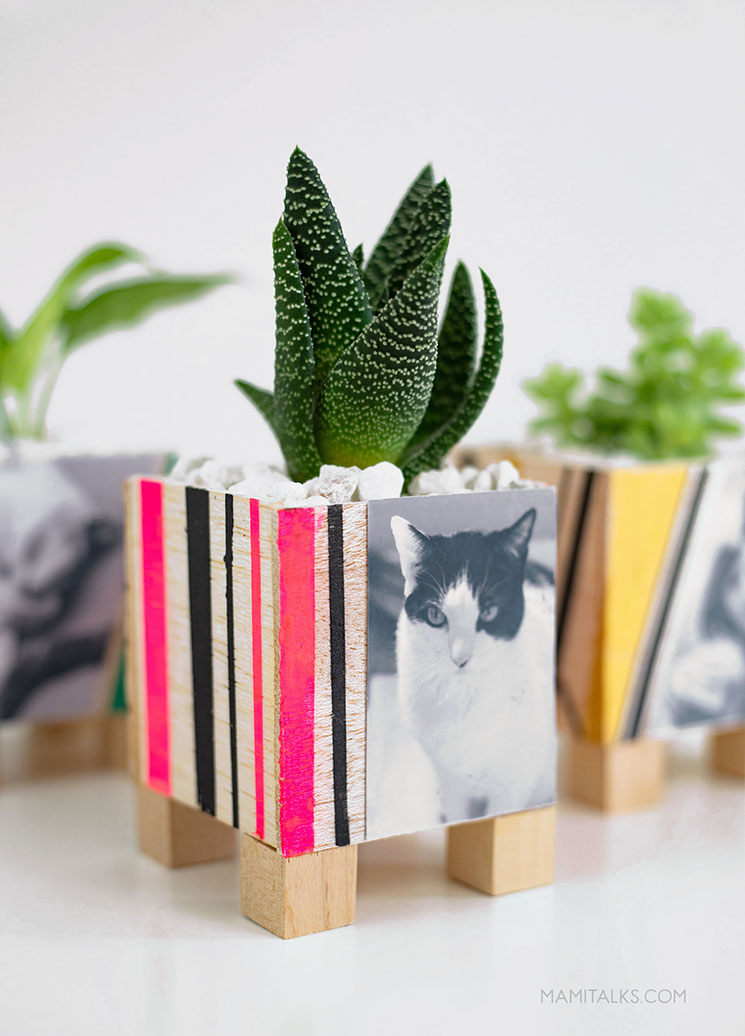
TIP: Make them with any printed kid’s art or have two photo sides instead of one, there is plenty of space to get creative!
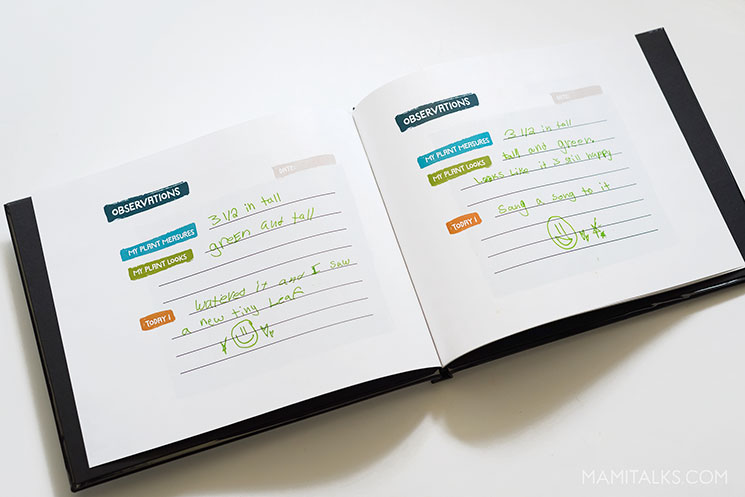
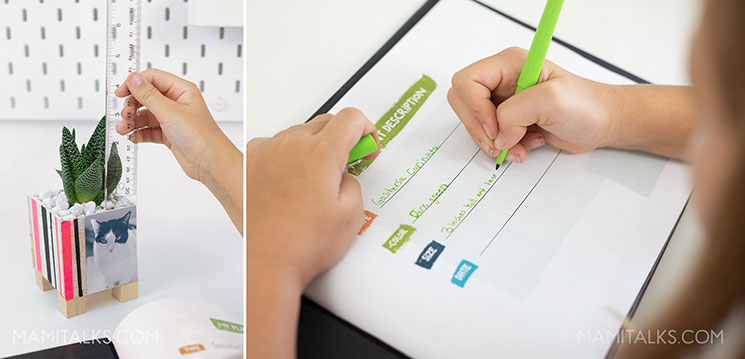
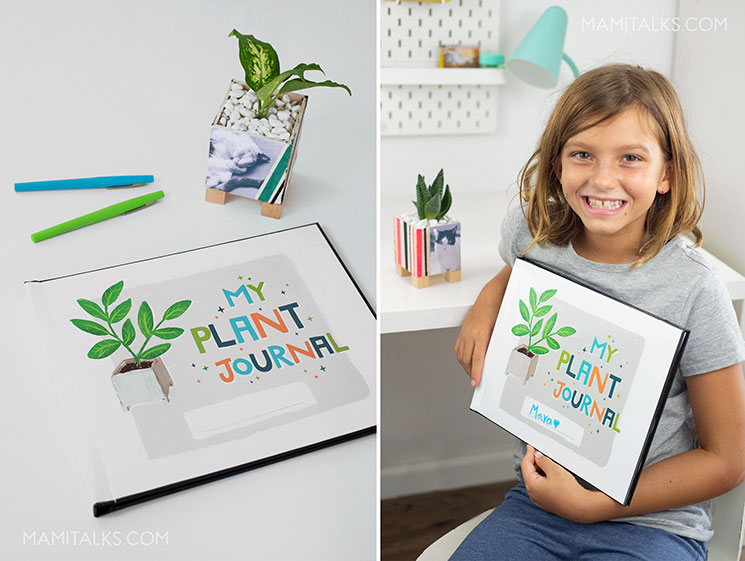
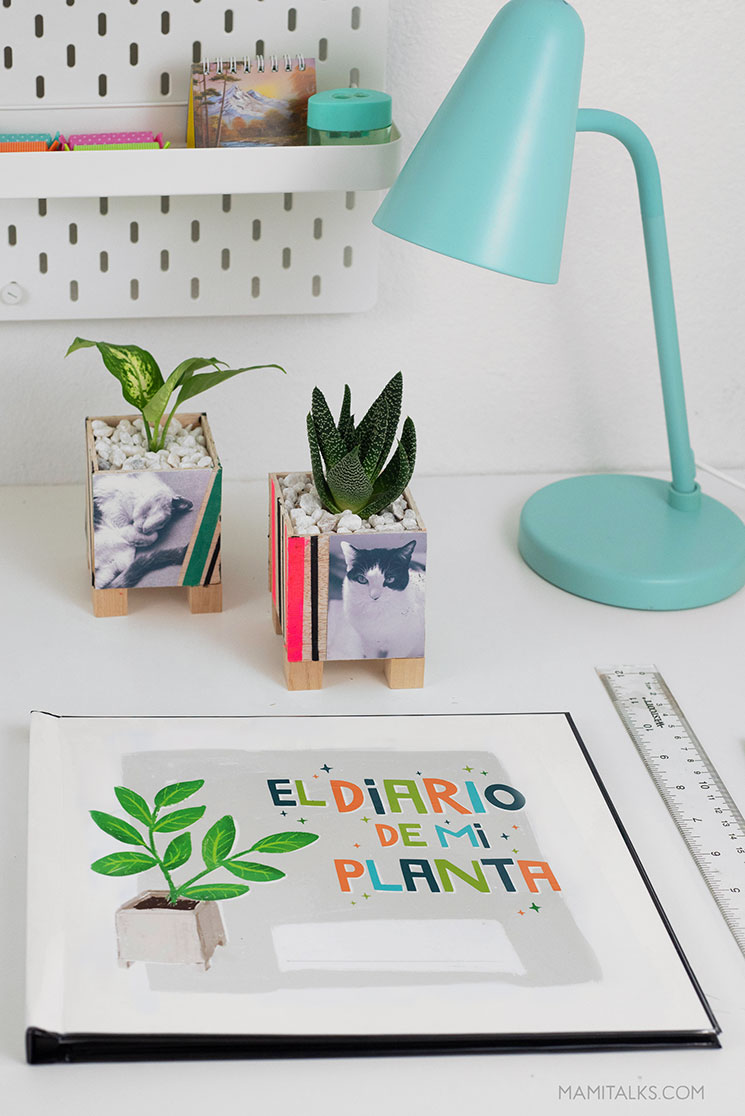
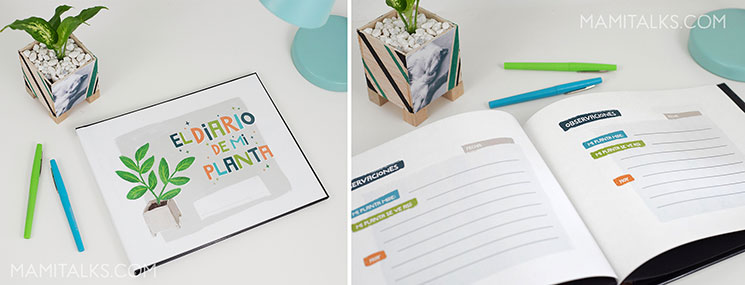
Now, the plant journal is the perfect companion to their new plant, kids can learn to take care of it and watch it grow. They will start to learn the skills of scientific observation, how to measure their plant, how much light and water it needs, identify any new parts (does it have flowers? New leaves? Are there any bugs?) I know that we both learned the name of the plant already and Maya even sang a song to it!!
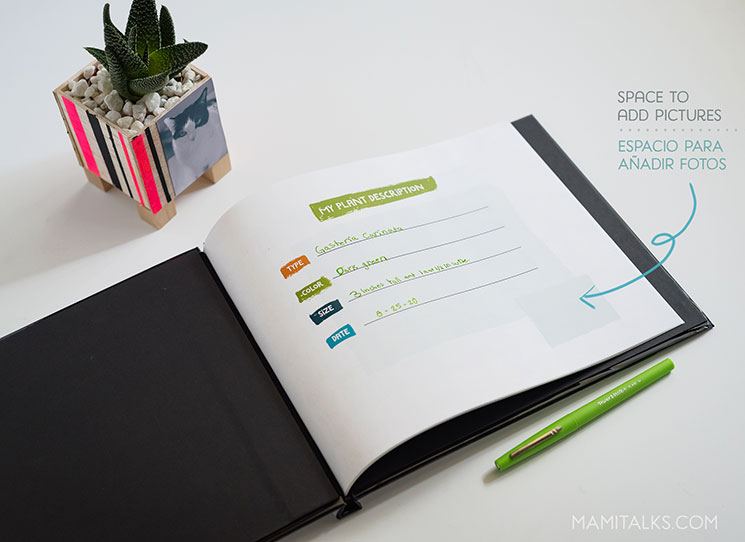
I designed the plant journal pages so you can make a photobook and print it with Walmart Photo same-day services. Scroll down for the detailed instructions!
DIY PHOTO PLANTER
SUPPLIES:
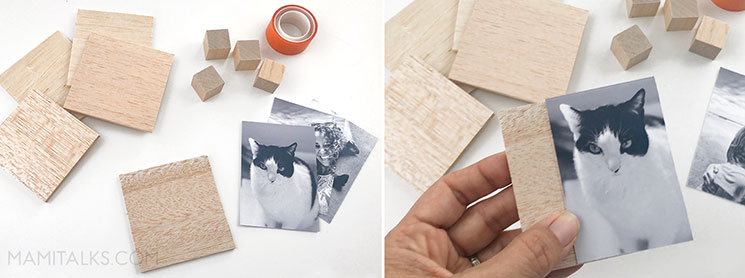
- Balsa wood pieces in the following sizes:
- 3 x 3 in (2 pieces, I used 2/16 in thick)
- 2.75 x 3 in (2 pieces)
- 2.75 x 2.75 in (1 piece, this is the bottom and it can be thicker than the sides)
- 4 wood blocks 0.5″
- Sharp craft blade (to cut the wood pieces)
- Wood glue
- Printed wallet photo or 4×6 size print
- Paint sticks or regular craft paint and paintbrush
- Washi tape
- Glue covering spray or acrylic sealer spray
- Small plant in a plastic pot about 3″ wide with its plate
- Small rocks to decorate
INSTRUCTIONS:
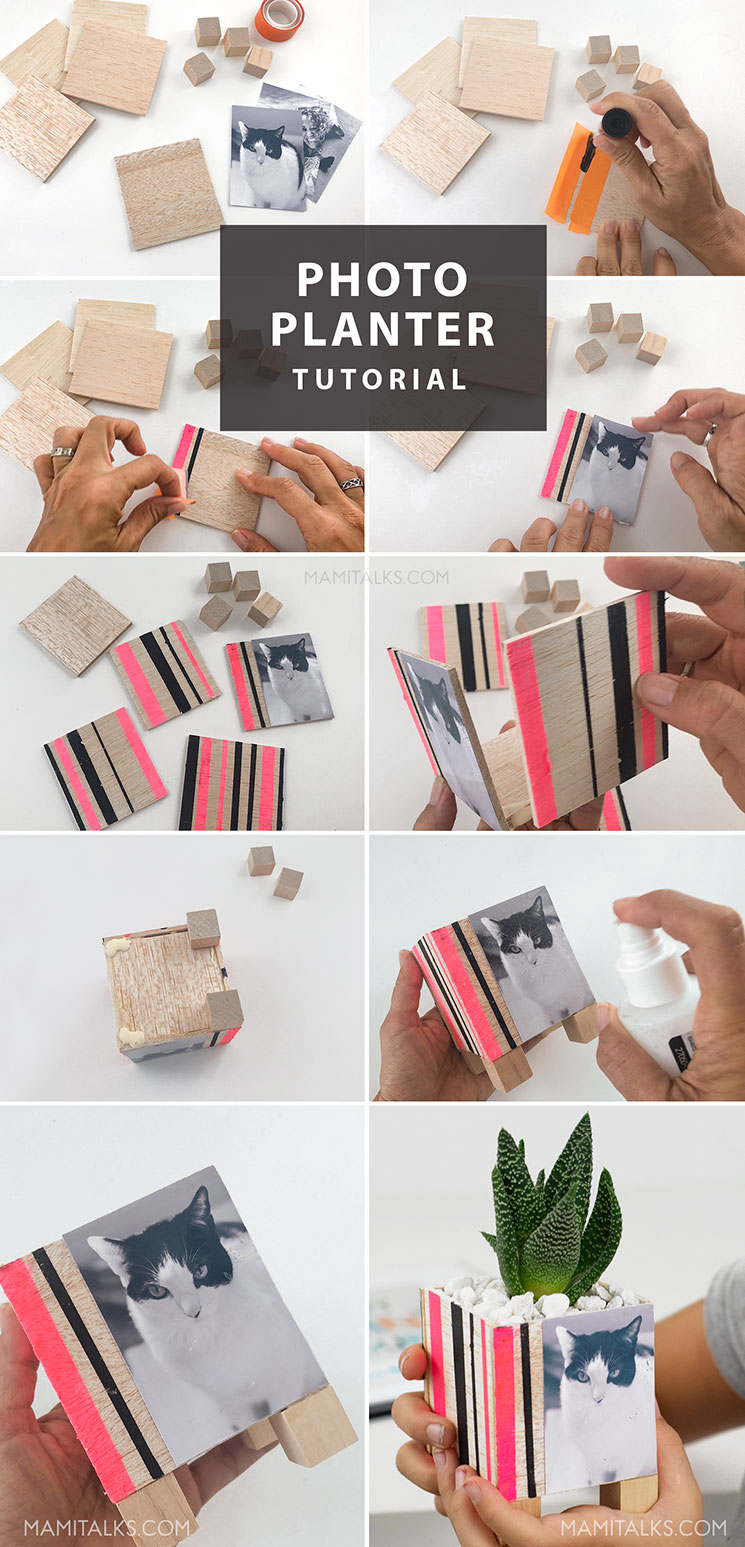
1. Use one of the 3″ x 3″ pieces first and decide how you will place your photo (TIP: The design will look cleaner if it’s a black and white picture!). I love how they look cut at an angle.
2. Cut your photo and mark with a pencil where the photo will go.
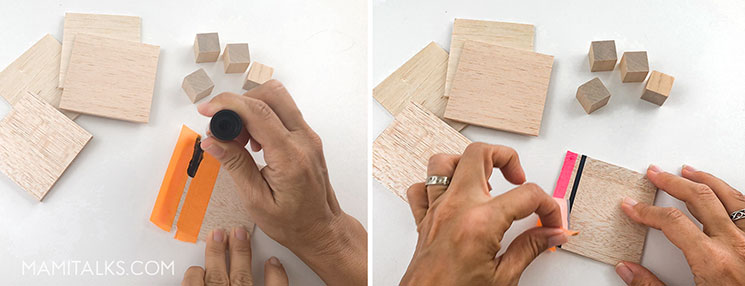
3. Pick 2 or 3 colors at the most to do your design. Mask the areas you won’t be painting with washi tape. I decided to do stripes and leave the wood to show.
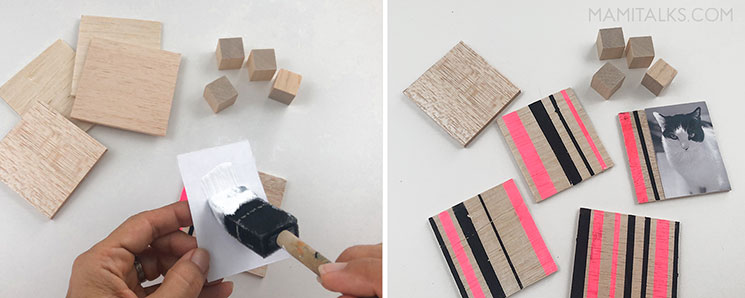
4. Glue your photo and paint the rest of the wood pieces. Let them dry for a little bit.
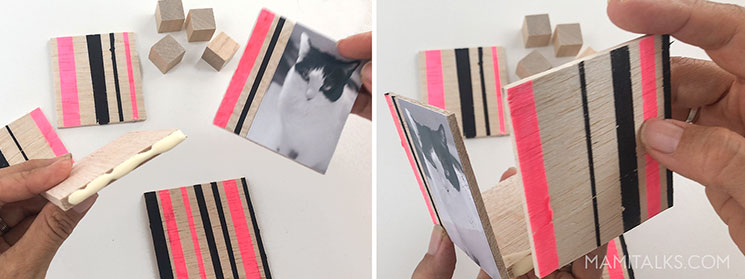
5. Apply glue to the borders and glue the planter together, start with the bottom piece and attach side by side. You might need to hold them pressing gently with your hands for about 5-10 minutes until the glue settles a little bit so it stays together. After it settles let it dry for 30 minutes or more.
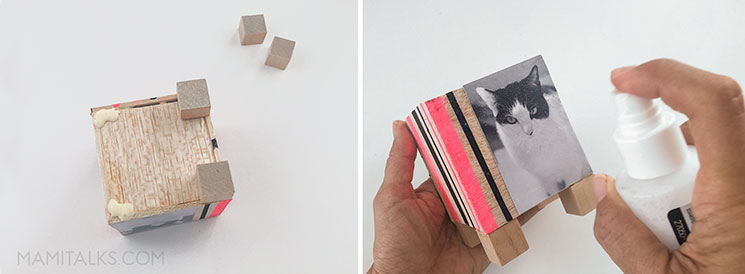
6. Turn the planter down and glue the 4 legs (wood blocks!). Let it dry for another 30 minutes.
7. Spray all the sides with the sealer and let it dry.
8. Place your plant and don’t forget the little plate, the balsa wood is very porous so you shouldn’t place a plant directly there or let the water touch it.
9. Add little rocks to decorate the top of your photo planter!

HOW TO PRINT THE PLANT JOURNAL
- Download the plant journal printables here.
- Go to Walmart Photo same-day products and pick the 8 x 11 photo book with hard custom cover, then pick the classic white design.
- Upload the 3 printables.
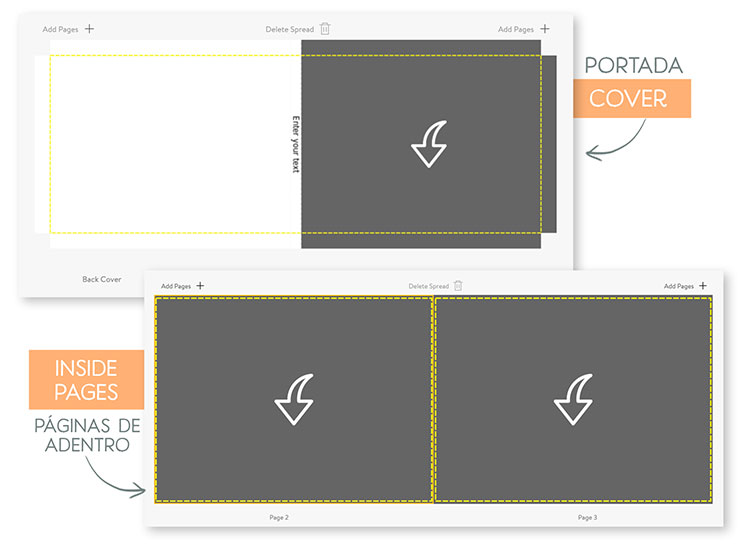
- Choose 1 photo full-size layout for all your pages (see screenshot sample below).
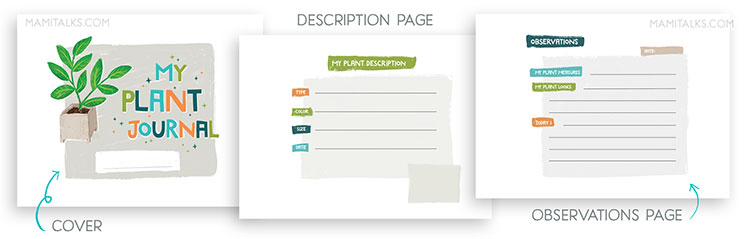
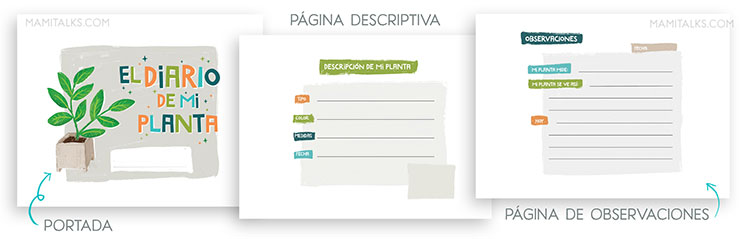
- With the printables, you get a cover, a description page, and an observations page which you will repeat throughout the whole book unless you want to divide the book into 2 parts so it can be used for 2 plants instead of just one.
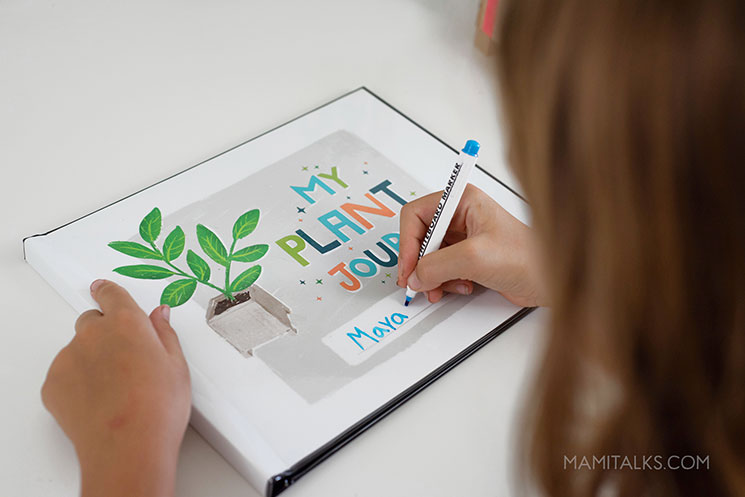
- It’s done! Let your child write their name and start learning to care for their new little friend!
As always, if you make them show me by commenting here or tagging me on social media!! —>Insta, FB, and Twitter.
ESPAÑOL
TUTORIAL PARA HACER MATEROS CON FOTOS Y UN DIARIO DE PLANTAS
Últimamente he estado un poco obsesionada con las plantas, tengo algunas nuevas ahora que nos mudamos y cuando Mayita me acompaña de compras me pregunta si ella también puede tener una planta propia.
Así fue que se me ocurrió esta idea de hacer un materito especial con fotos donde ella pueda tener su matica en su escritorio y aprender a cuidarla con el del diario de plantas.
Las fotos y el diario se pueden hacer a través de Walmart Photo, una vez que decidan cuáles fotos imprimir, es asequible y está todo listo el mismo día, ¡no tiene que esperar mucho para hacer esta manualidad!
Cuando empezamos a hacerlo, le pregunté a Maya qué foto le gustaría usar y las fotos ganadoras fueron las de los gatitos. Si fuera por mí, elegiría la foto de nosotras juntas, pero tengan en cuenta para quién harán el materito y así sea bien personalizada.
El materito lo hicimos juntas, ella pudo usar el teipe para tapar y pintar las rayas ella misma, incluso decidió qué colores usar, ¡¡Pasamos un rato muy chévere compartiendo esto!! ¡Pruébalo con tus hijos!
TIP: También lo pueden hacer con cualquier arte infantil impreso e incluso usar dos lados para fotos en vez de uno, ¡hay mucho espacio para ser creativo!
Ahora, el diario de plantas es el compañero perfecto para la nueva matica, los niños pueden aprender a cuidarla y verla crecer. Empezarán a aprender cómo se hace la observación científica, a aprender cómo medirla, saber cuánta luz y agua necesita, a identificar las partes nuevas (¿tiene flores? ¿Hojas nuevas? ¿Hay insectos?) ¡Ya las dos aprendimos el nombre de la planta y Mayia hasta le cantó una canción!
Diseñé las páginas del diario de plantas para que las puedan imprimir como un album de fotos con los servicios de Walmart Photo del mismo día. Más abajo en el post pueden ver las instrucciones detalladas.
TUTORIAL PARA HACER UN MATERO CON FOTOS
MATERIALES:
- Madera balsa de los siguientes tamaños:
- 2 piezas de 3″ x 3″ (yo usé las de grosor 2/16″)
- 2 piezas de 2.75″ x 3″
- 1 pieza de 2.75″ x 2.75″ (esta será la parte de abajo del matero y puede ser más gruesa que las demás)
- 4 cubitos de madera de 0.5″ (estos pueden ser de otro tipo de madera)
- Foto en blanco y negro tamaño wallet o tamaño 4 x 6
- Pega para madera
- Barritas de pintura o pintura de manualidades con pincel
- Teipe tipo washi
- Spray sellador de acrílico o tipo pega
- Planta pequeña en un materito de plástico de 3″ con su platico
- Piedritas para adornar
INSTRUCCIONES:
1. La primera pieza a usar debe ser una de las de 3″x 3″. Decide cómo vas a colocar tu foto (TIP: El diseño se verá más limpio y coordinado si es una foto en blanco y negro). Me encanta cómo se ven las fotos cortadas en ángulo.
2. Recorta tu foto y marca con un lápiz el borde donde irá la foto.
3. Elije 2 o 3 colores como máximo para hacer tu diseño. Usa el teipe para enmascarar las áreas que no vas a pintar. Yo decidí hacer rayas y dejar que se vea la madera, me parece que es fácil y se ve bien bonito.
4. Pega tu foto y pinta el resto de las piezas de madera (no pintes la pieza que va abajo), déjalas secar un poco.
5. Ponle pega a los bordes de las maderitas y págalas todas para crear el matero, comienza con la pieza de abajo y coloca los lados uno a uno. Es posible que debas sostenerlas presionando suavemente durante unos 5-10 minutos hasta que el pegamento se asiente un poco y permanezca unido. Después de que se asiente, déjalo secar unos 30 minutos o más.
6. Voltea el meterito hacia abajo y pega las 4 patas (¡los cubitos de madera!). Déjela secar durante otros 30 minutos.
7. Échale spray a todos los lados y deja secar.
8. Coloca tu planta en el matero y no olvides el platito, la madera balsa es muy porosa por lo que no debes colocar una planta directamente allí ni dejar que el agua la toque.
9. ¡Agrega las piedritas para decorar la parte de arriba!
CÓMO IMPRIMIR EL DIARIO DE PLANTAS
- Descarga los imprimibles del diario de plantas aquí.
- Ve a la página de productos del mismo día de Walmart Photo y elige el álbum de fotos tamaño 8 x 11 con cubierta dura personalizada, luego elige el diseño blanco clásico.
- Sube las 3 páginas.
- Ya cuando estés adentro del album, elige el diseño que tiene solo una foto tamaño completo para todas las páginas (puedes ver el ejemplo de captura de pantalla más arriba en este post).
- Los imprimibles incluyen una portada, una página descriptiva y una página de observaciones la cual repetirás a lo largo de todo el libro a menos que quieras dividir el libro en 2 partes para que se pueda usar para 2 plantas en lugar de solo una.
- ¡Listo! ¡Los niños pueden ponerle su nombre y comienzar a aprender a cuidar a su nueva amiguita!
Si lo hacen cuéntenme en los comentarios o etiquétenme en mis redes sociales! —>Insta, FB, y Twitter.
PIN THIS POST WITH THIS IMAGES:
2 Comments
Mercedes
September 20, 2020 at 7:17 pmMe pareció excelente !!??te felicito , Dari❤️❤️Y también a Maya por motivarse hacer el de ella ?
Dariela Cruz
October 13, 2020 at 3:15 pmGracias Merce!!