

Making Valentines for the kids to bring to their friends has turned into a fun challenge for me year after year since I made the Crayon Hearts Valentines. This time I wanted to work with polymer clay, it comes in many colors and it is super easy to work with, you just put it in your regular oven and done, no need of a special oven or other big supplies.
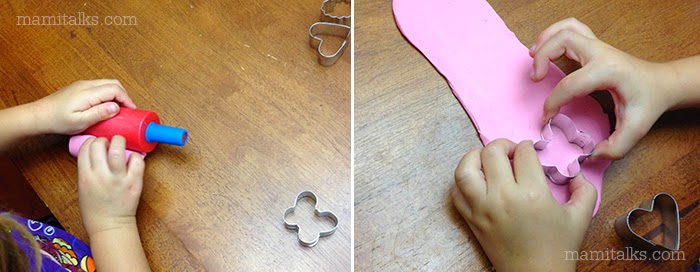
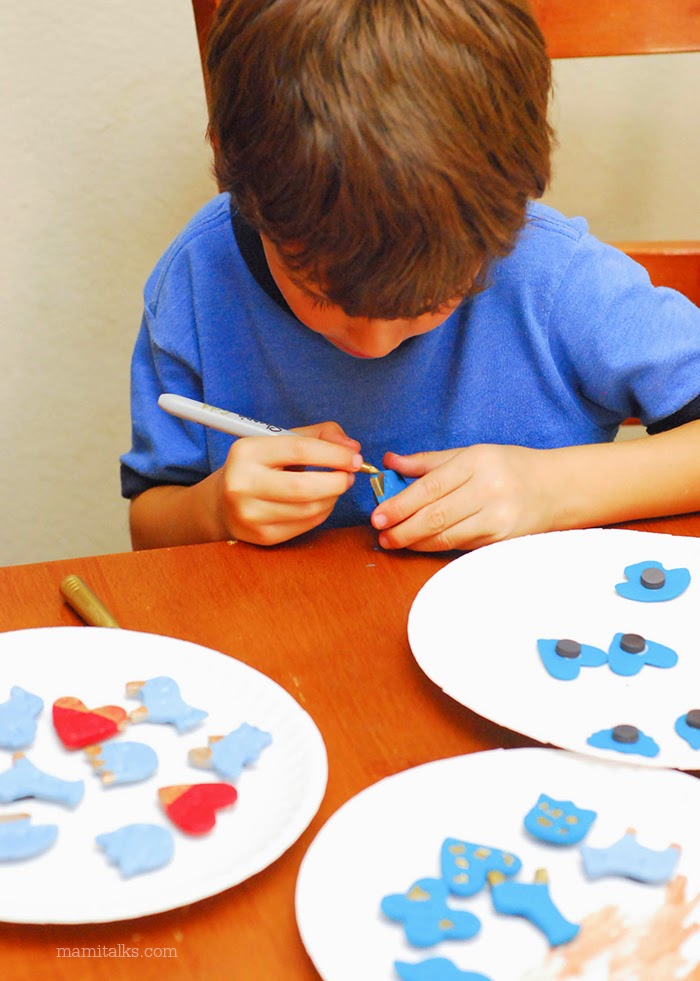
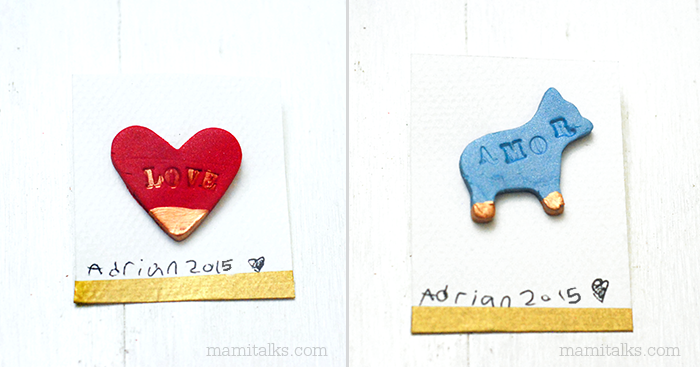
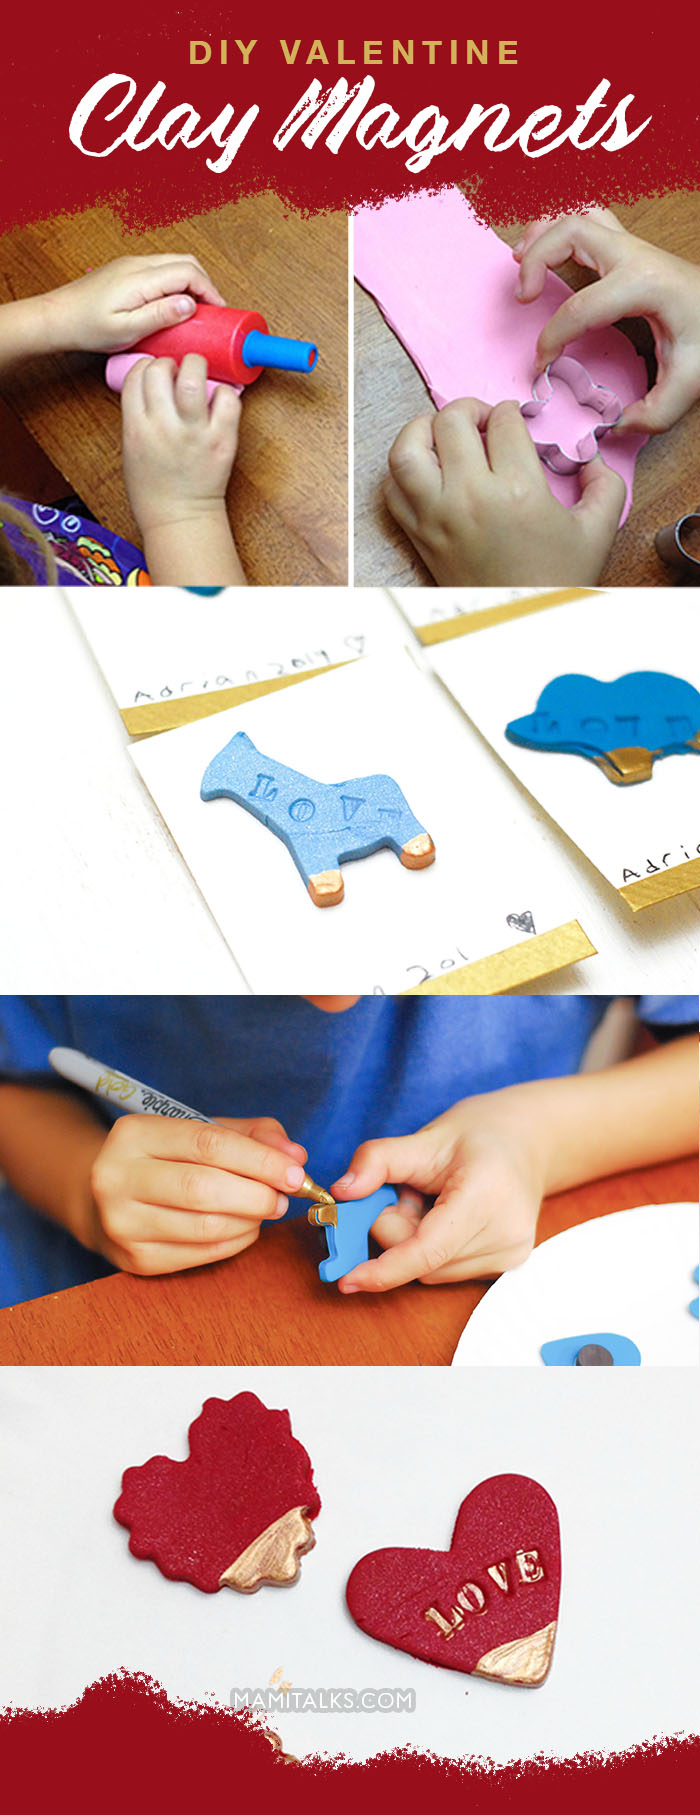
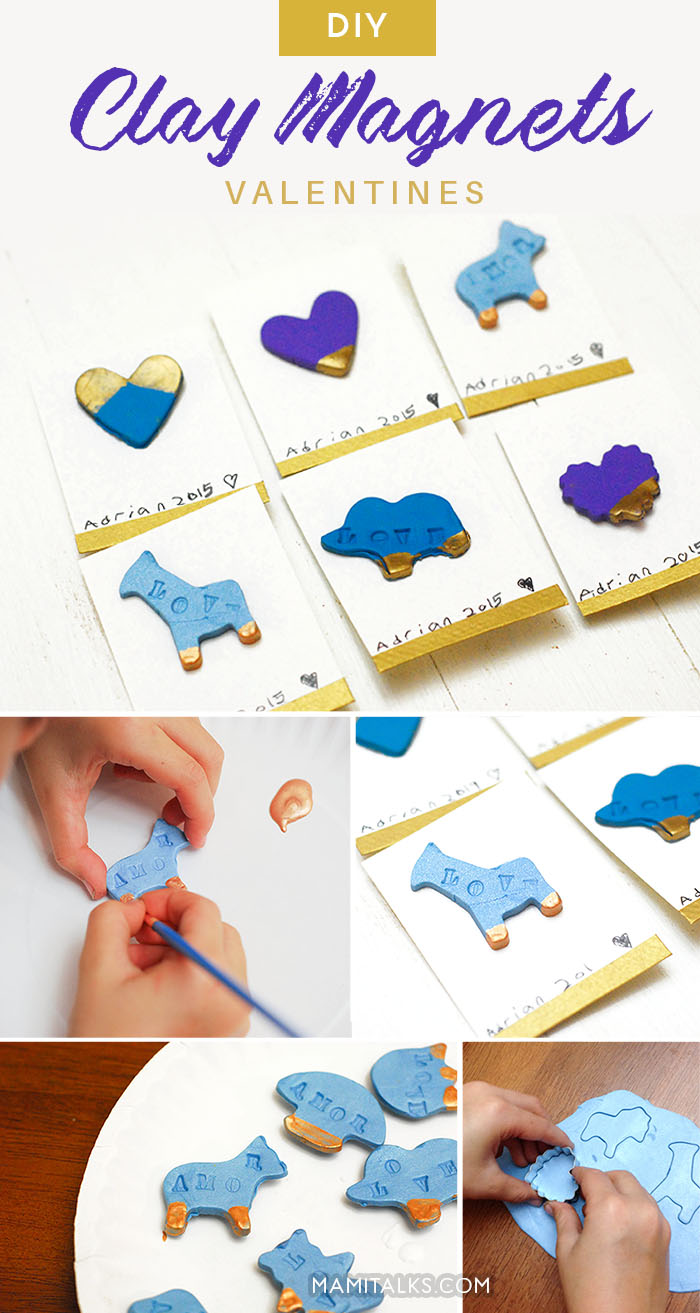
These DIY Magnet Valentines are super fun for kids to make too, Adrian and Maya rolled out the clay, used the cookie cutters and then painted on the final pieces. Adrian wrote his own name to the cards and they both helped to put them together.
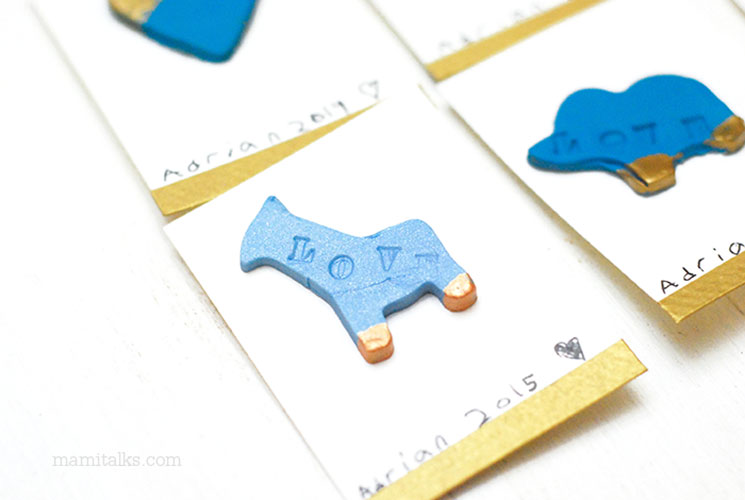
The magnets turn out to be so pretty and useful, which is my goal, something that you won’t have to throw away in a month!
HERE IS HOW TO MAKE THE CLAY MAGNETS:
Supplies:
- Soft modeling Clay (like Sculpey)
- A rolling pin
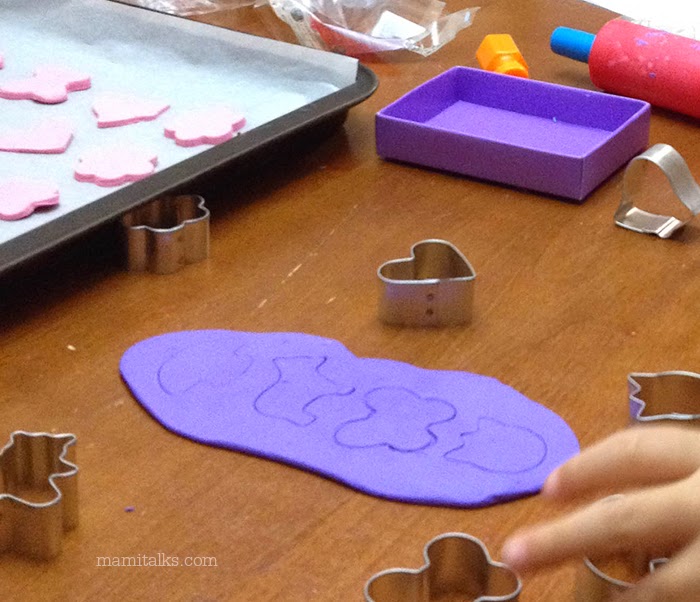
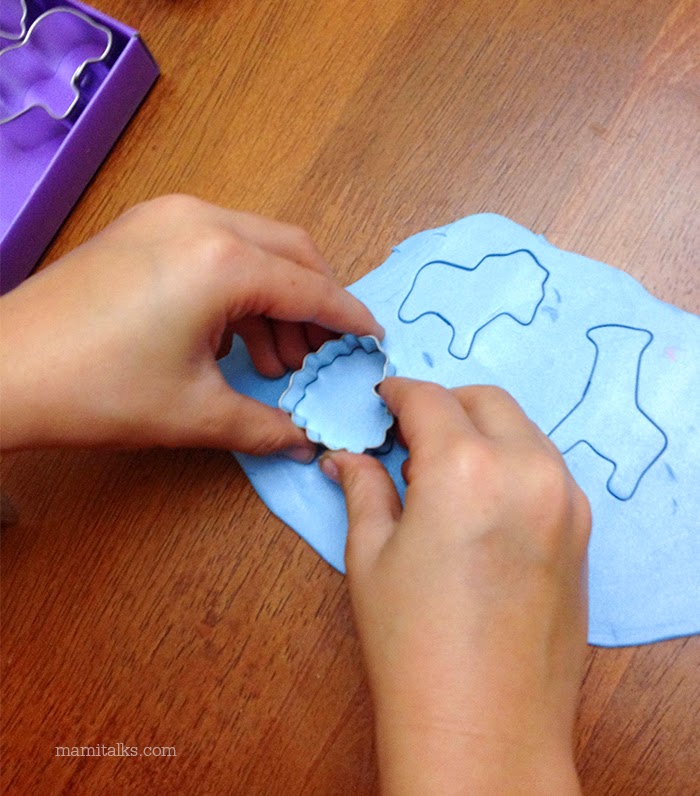
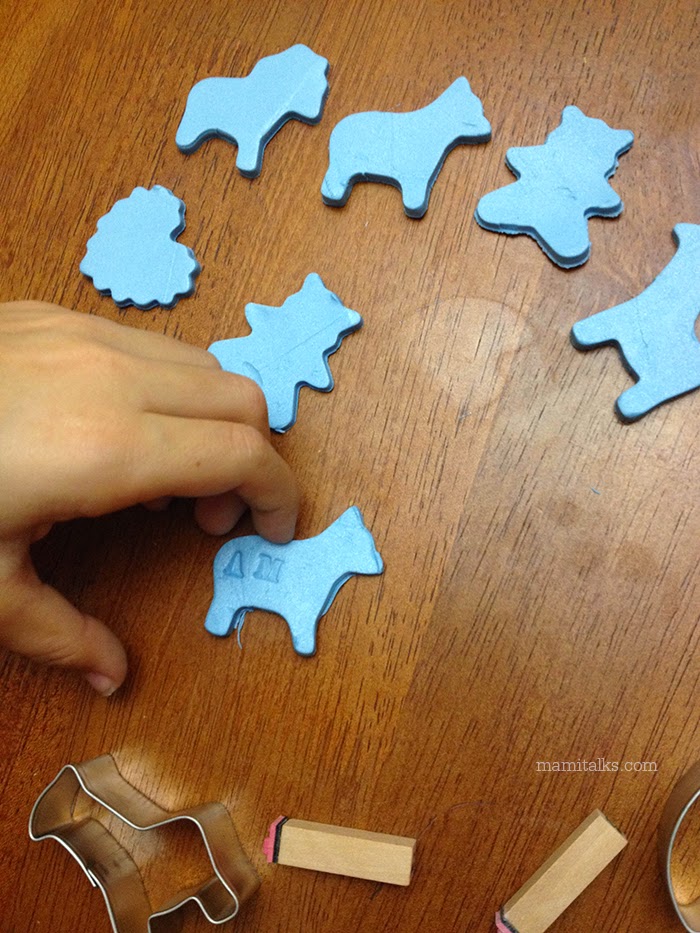
- Cookie cutters (we picked animals and hearts)
- Letter stamps
- Parchment paper
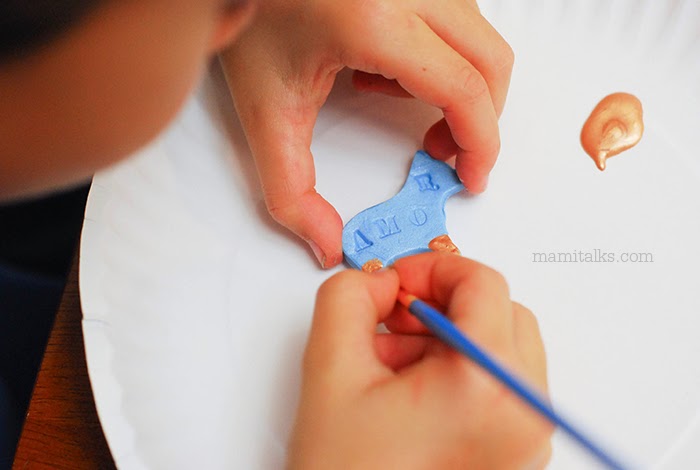
- Gold paint and paintbrush or Gold Sharpie
- Mini magnets
- Glue gun
- Small cards to place the magnets
Instructions:
- Roll the clay and flatten it the most you can with the rolling pin.
- Use the cookie cutters to cut out the shapes you want.
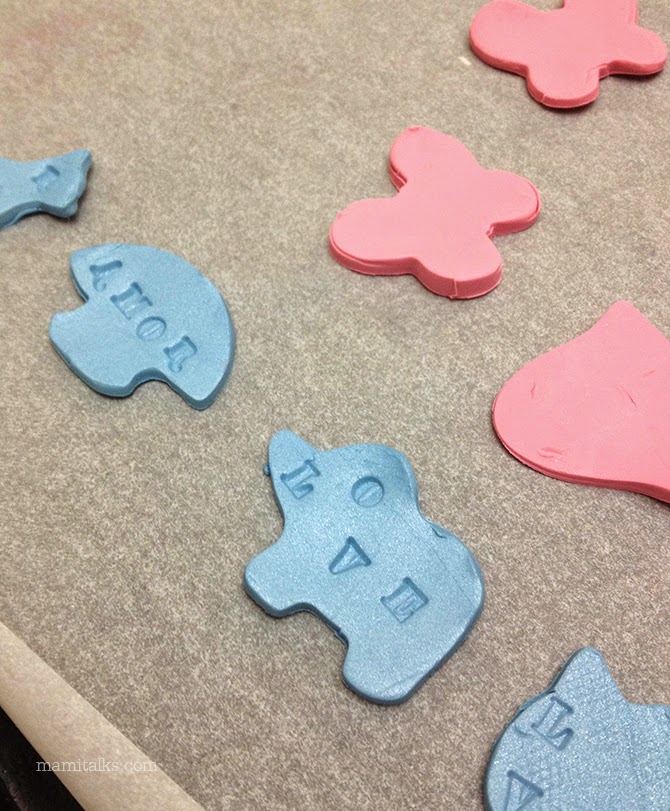
- Spell out words on the shapes with the stamps, we did LOVE and AMOR. Sometimes we didn’t do any words which works well too.
- Place them all on an oven tray with a layer of parchment paper.
- Bake according to the clay instructions. I found myself using more time to make sure they were good.
- Let them cool for about 15 minutes at room temperature.
- Glue the mini magnets to the back with the glue gun and let them dry for another 15 minutes.
- Proceed to paint details on them with the marker or the paint, have fun with this!
- To mount them on the cards, use a craft knife to cut a small X on the center and then punch the magnet through it. I added an extra touch to the bottom edge of the card with gold washi tape I had. It’s a simple touch that can help bring it all together!


– ESPAÑOL –
IMANES DE ARCILLA PARA EL DÍA DE SAN VALENTÍN
Hacer regalitos para el día de San Valentín para que los niños lleven a sus amigos se ha convertido año tras año en un reto divertido para mi desde que hice los creyones en forma de corazón. Esta vez quería hacer algo con arcilla (Polymer clay), viene de muchos colores y es muy fácil de usar, se mete en el horno normal y listo, no hay necesidad de usar un horno especial ni otros otras cosas especiales.
Estos imanes son super divertidos para que los niños los hagan también. Adrian y Maya extendieron la arcilla, la cortaron con los cortadores de galletas y luego pintaron las piezas finales. Adrian escribió su propio nombre en todas las tarjetas y los dos ayudaron ensamblarlos.
Los imanes resultaron ser un regalito tan bonito y útil, lo cual es siempre mi meta, algo que no tendremos que botar en un mes!

AQUÍ LES EXPLICO CÓMO HACER LOS IMANES DE ARCILLA:
Materiales:
- Arcilla o pasta suave (como Sculpey)
- Un rodillo
- Cortadores de galletas (nosotros usamos animalitos y corazones)
- Sellos de letras
- Papel para hornear
- Pintura dorada y pincel o un marcador Sharpie dorado
- Imanes tamaño mini
- Pegamento caliente
- Tarjetas pequeñas para colocar los imanes
Instrucciones:
- Usa el rodillo y trabaja la arcilla para aplanarla lo más que se pueda.
- Usa los cortadores de galletas para cortar las figuras que quieran.
- Deletrea palabras en cada figura con los sellos, nosotros hicimos AMOR y LOVE. Algunas veces no pusimos ninguna palabra y se ven bien también.
- Colócalos en una bandeja de hornear con sobre papel de horno.
- Hornea de acuerdo con las instrucciones de la arcilla. A mi me pasó que usé un poco más de tiempo del que decía en el empaque para asegurarse de que quedaran bien duritos.
- Deja enfriar por unos 15 minutos a temperatura ambiente.
- Pega los mini imanes en la parte de atrás con la pega caliente y deja que se sequen durante otros 15 minutos.
- Procede a pintar detallitos sobre los imanes ya listos con el marcador o con la pintura, ¡diviértanse con esto!
- Para montarlos en las tarjetas, usa una cuchilla de manualidades y corta una pequeña X(equis) en el centro y luego pincha el imán a través de la equis. Yo le añadí un toque extra al borde inferior de la tarjeta con teipe washi dorado que tenía a la mano. ¡Es un toque simple que puede ayudar a que se vea todo muy bien junto!


2 Comments
Mari Corona
January 16, 2015 at 2:09 amWonderful share great idea. Will def try with my nieces and nephews!
dcruz
January 16, 2015 at 8:46 pmOh cool, let me know if you make them, thank you!!