
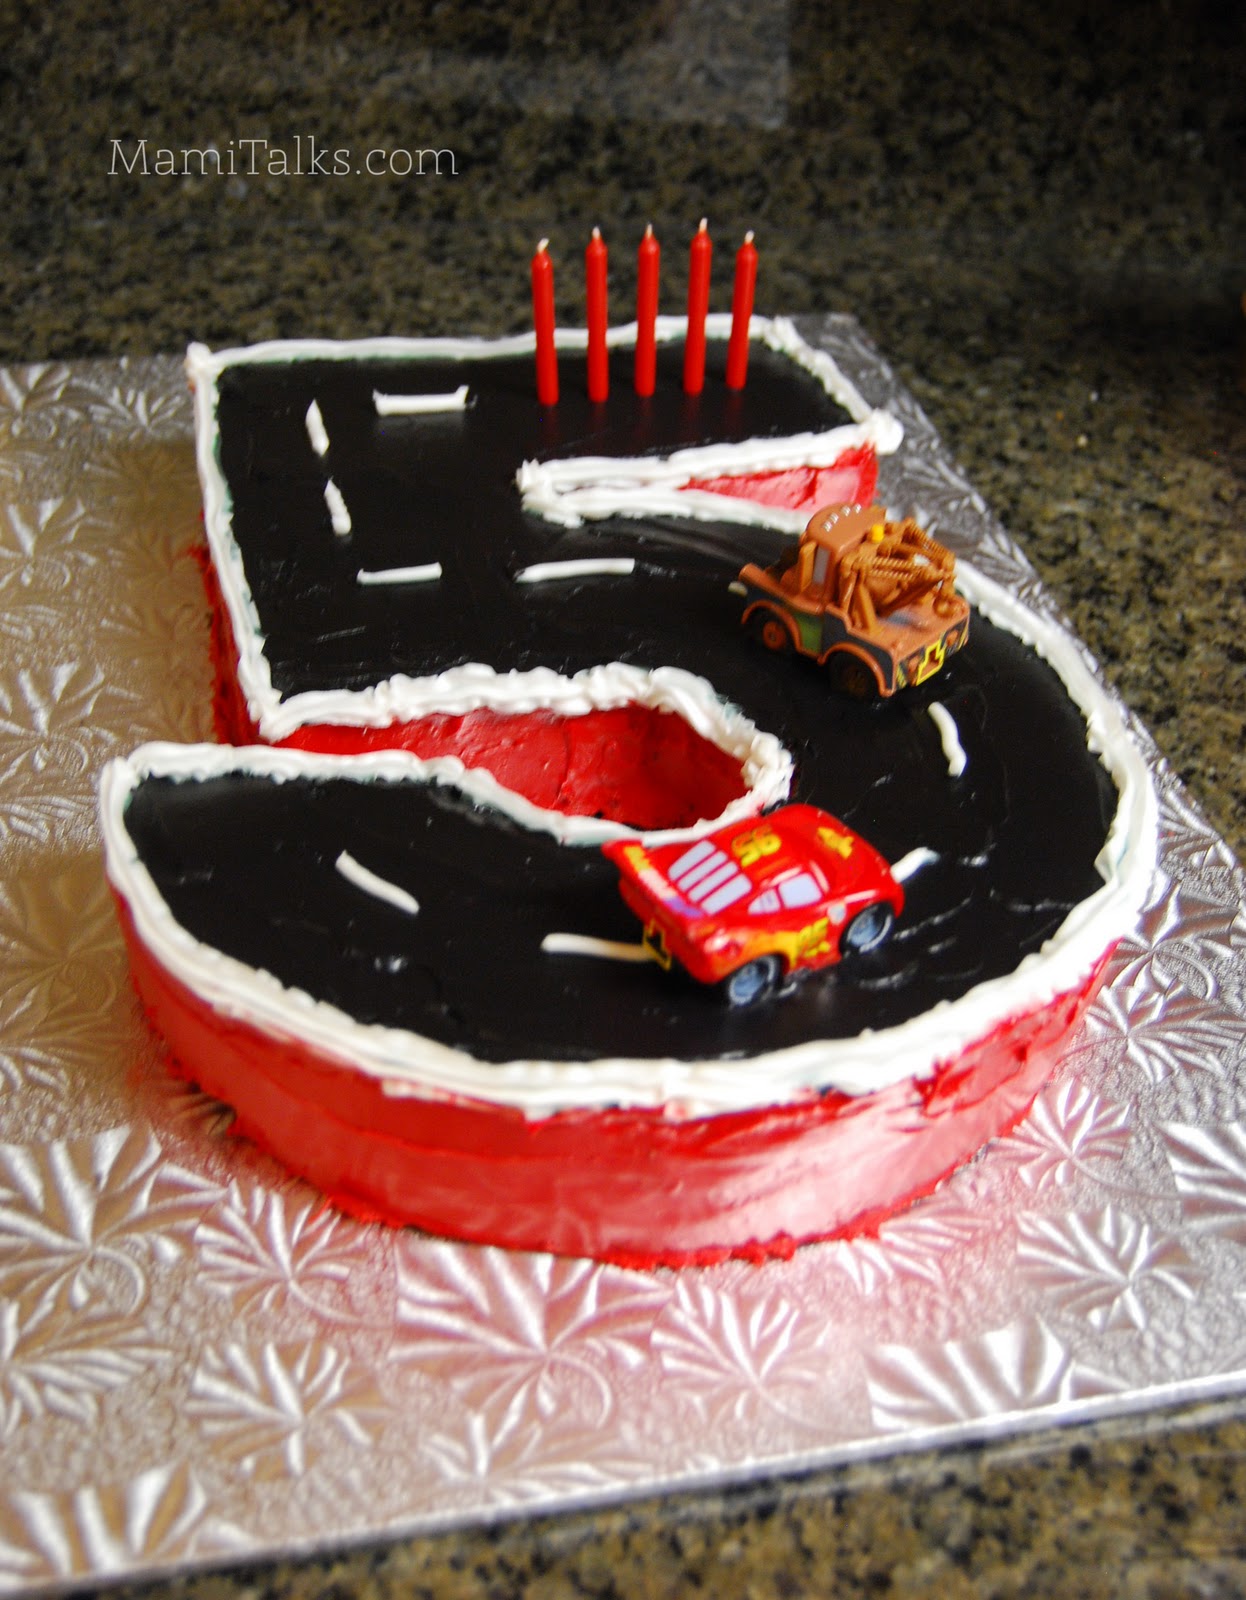
When we were planning Adri’s birthday he pulled out a book that I have of different fun cakes for kids. He asked me to make one for him. There were a lot of them and I don’t have any experience in baking cakes and making such complicated decorations, so I told him I would make the #5 cake and he was very happy.
I then thought about the theme of the party: the movie Cars, so I decided to make a road and add a Lighting McQueen and a Mator, I got those as regular toys and just placed them on top and it everything turned out great!
It wasn’t that easy though, I did have to research a lot in Google, ask around, post in twitter, find the trays I needed, the type of frosting, etc, etc. Here is a little summary of the process:
- I baked 2 cakes, a round one and a square that I cut into 2 rectangles to make the shape of the five.
E S P A Ñ O L
Cuando estaba planeando el cumpleaños de Adri hace poco, el sacó un librito que yo tengo de cómo hacer tortas de diferentes figuras para niños y me pidió que le hiciera una. Habían muchas y complicadas, entonces le dije que le haría la del 5 y se contentó mucho.
Después me puse a pensar en cómo le pondría a la torta el tema de la fiesta que era la película de Cars, así que decidí hacer la pista y ponerle los carritos, agarré Mator y McQueen, son juguetes de verdad y resultó todo chévere…
Bueno, después de tanto trabajo e investigación, busqué en Google, pregunté en twitter, pregunté a gente conocida, busqué las bandejas correctas, el tipo de glaseado, etc, etc. Aquí les dejo un resumen de lo que hize:
- Horneé 2 tortas, una redonda y una cuadrada que la partí en 2 rectangulos para poder hacer el 5.

- I got too much frosting, (I realized later after I finished, sooo much left over!) but I was nervous about the red because all the info I found said that it is the hardest color to obtain because as soon as you mix the ink with white it turns out pink. But I did found a Wilton forum that recommended to get the Re-Red and Red (No Taste) Icing colors, and that really worked well!!
- For the black I used chocolate frosting and added black color so it became black pretty easy.
E S P A Ñ O L
- Usé el glaseado pre-hecho, me di cuenta que compré mucho (después de terminar porque me sobró un montón!) pero lo que parecía más dificil era lograr el color rojo porque en todos lo que leí y lo que me dijeron era que se convierte en rosado cuando uno le echa el colorante rojo pero encontré unos foros de la marca Wilton que decían que usara el colorante Red-Red y el Red (No Taste) así que esos usé y quedó perfecto!!
- Para el glaseado negro usé el de chocolate y luego le eché el color negro e inmediatamente se puso todo negro.

- I added a white line in between both colors and the dotted line thru the middle to make the road. I was very unsure on where to place the candles but my mom was there to help me
with Maya, calm me down when I thought it wasn’t going to work out andbounce ideas (thanks mami!) and we found that place to be the perfect spot. It wasn’t easy to find red candles btw, they mostly come in pastel colors, but I found a package of bright bold colors that had them.
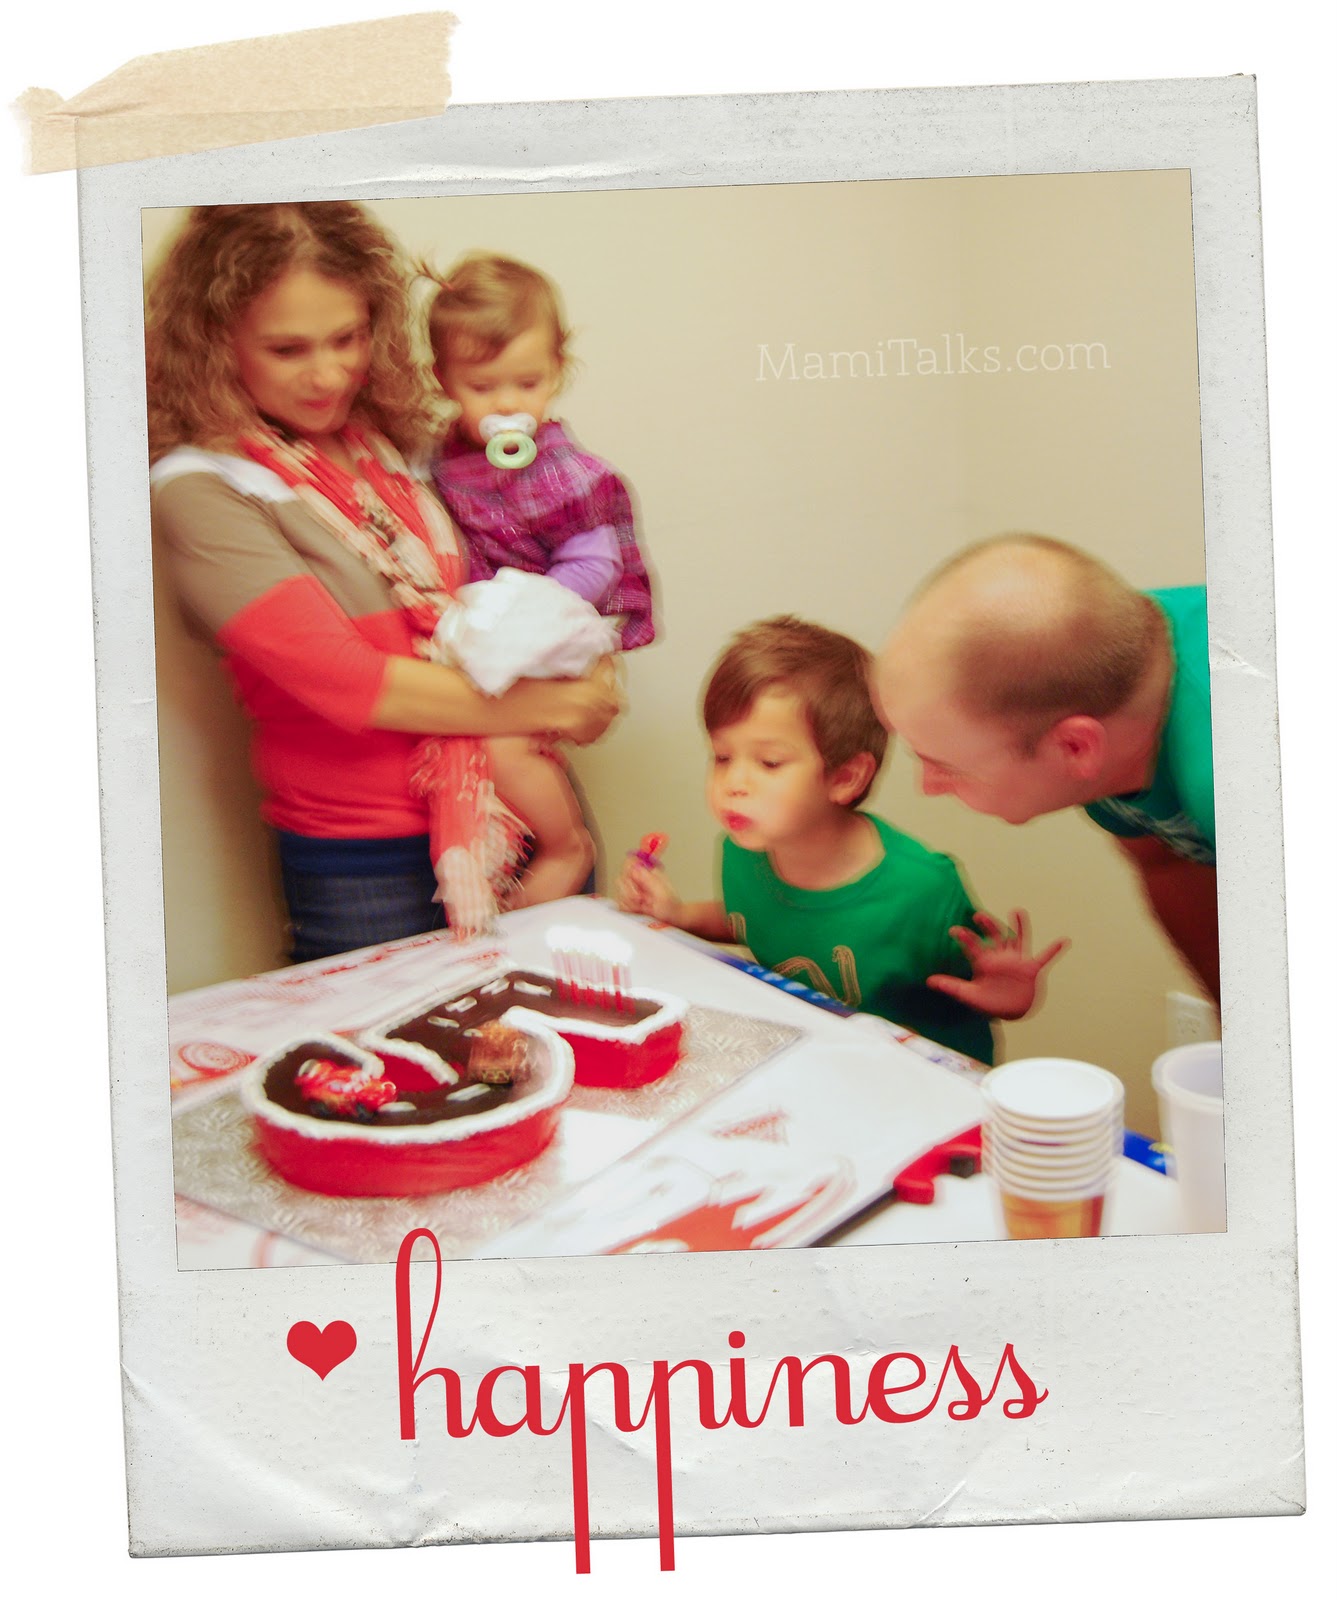
- You’ll notice that the final cake was a little broken in the middle (see photo below). It was starting to melt! So, I should have left it in the fridge during the party but I wanted to show it off!! It was so hard to take the pictures os the step-by-step meanwhile making and decorating a cake for the first time but I loved it and the boy was absolutely happy on his day despite anything else! 😉
E S P A Ñ O L
- Le añadí una linea blanca entre cada color y la líneas que dividen los carriles de la pista. Estaba un pooco indecisa en donde poner las velitas pero mi mamá estaba aquí conmigo ayudándome
con Mayita, calmándome cuando me volvía loca pensando que no me iba a quedar biena tomar decisiones (gracias mamita!) y decidimos que el lugar perfecto era el que ven en la foto abajo. Por cierto, no me fué fácil encontrar velas rojas, las venden en colores pasteles casi siempre pero estas las encontré en un paquete que tenía varios colores fuertes.
- Notarán que la torta final está un poquito rota en la mitad (vean la foto aquí abajo). Se estaba empezando a derretir! La he debido de dejar en la nevera durante la fiesta pero es que quería dejarla afuera para que adornara la fiesta y la gente la viera!! Me costó bastante tomar fotos de todo el proceso mientras que la estaba haciendo y al final también porque la luz no era nada buena pero Adri quedó fascinado con su torta y muy muy feliz en su día!

5 Comments
Elvira
December 6, 2011 at 3:52 pmQue bonito tu post hija, ahora todo el proceso quedo aqui plasmado. Me encanta la manera como cuentas tus vivencias. Te quiero mucho y aqui estoy siemre lista como los scout!
Mama y ABU Elvira
Marcela
December 6, 2011 at 6:38 pmCongrats on making such a beautiful cake!!! Truly looks perfect!
Will definitely come back to this post…you have inspired me to try and make one ( :
Inês Seabra
December 6, 2011 at 7:16 pmSo cute! love it! looks so much like a present I'm making for My friend's baby boy, I'll come back to show you when done.
Party Artist
December 6, 2011 at 10:29 pmTe quedo bella! http://Www.p-art-y.blogspot.com
MAYITO CASTILLO
December 7, 2011 at 3:09 amTe quedo lindo, y original el pastel.
Eres toda una experta.Ya podemos abrir un negocio. Me apunto.